

Install ClientFence on your server
The web installer sets up your database and first admin account. Check the server requirements first.
Install
Section titled “Install”In your hosting panel or database tool, create a MySQL or MariaDB database and a user with full rights on it. Keep the connection details for the installer.
Choose Hosting control panel (no SSH) or SSH / terminal to put the files on your server. Both paths use the same web installer.
Hosting control panel
Section titled “Hosting control panel”-
Open Download ClientFence and download the ZIP.
https://clientfence.com/download/ -
Open File Manager and go to the document root for your domain or subdomain.
-
Upload and extract the ZIP there. Confirm
index.php,install/and.htaccessare directly in the document root. Enable Show hidden files if your file manager hides.htaccess. -
Remove the uploaded ZIP from the document root and continue to the web installer.
-
Sign in as the website user. If you signed in as root on Enhance, switch to the website user first. Replace
usernamewith your website’s system username.Terminal window su - username -
Download the latest stable release to your home directory.
Terminal window wget -O ~/clientfence.zip https://clientfence.com/download/latest.zip -
Once the download finishes, go to your domain or subdomain’s document root. Replace
~/public_htmlif your host uses a different path.Terminal window cd ~/public_html -
Once you’re in the document root, extract the ZIP.
Terminal window unzip ~/clientfence.zip -
List the files, including hidden ones.
Terminal window ls -laConfirm
index.php,install/and.htaccessare directly in the document root and continue to the web installer.
Run the web installer
Section titled “Run the web installer”Open the installer in your browser. Replace billing.example.com with your domain or subdomain.
https://billing.example.com/install/-
License Agreement. Read and accept the licence, then select Next.
-
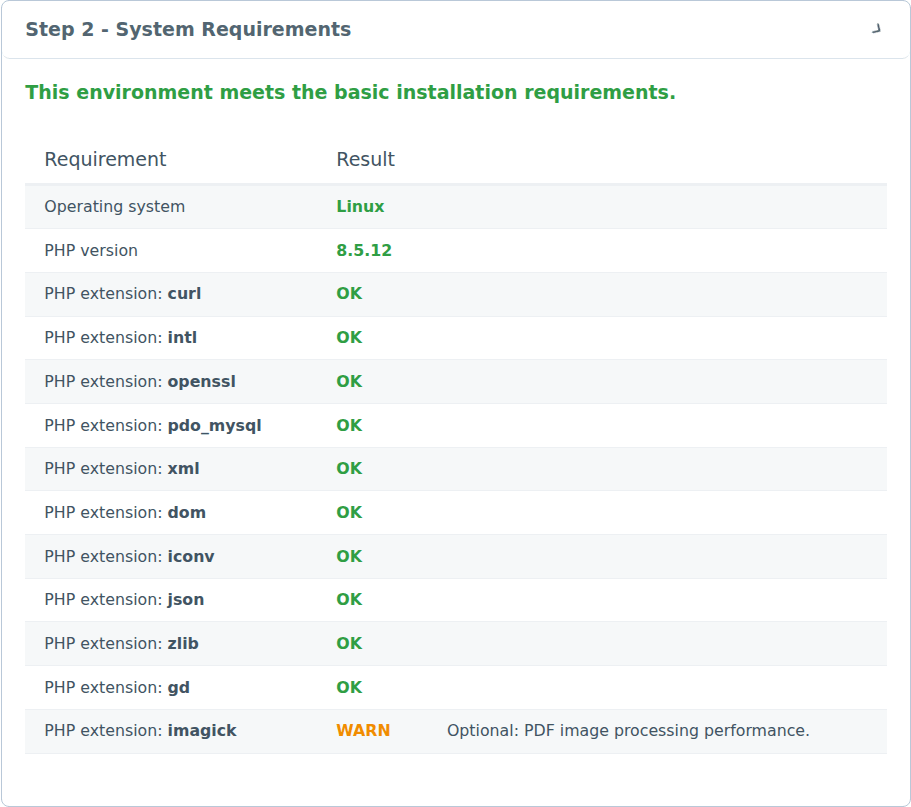
System Requirements. Confirm the server meets the basic requirements and select Next. The screen flags optional extensions separately.
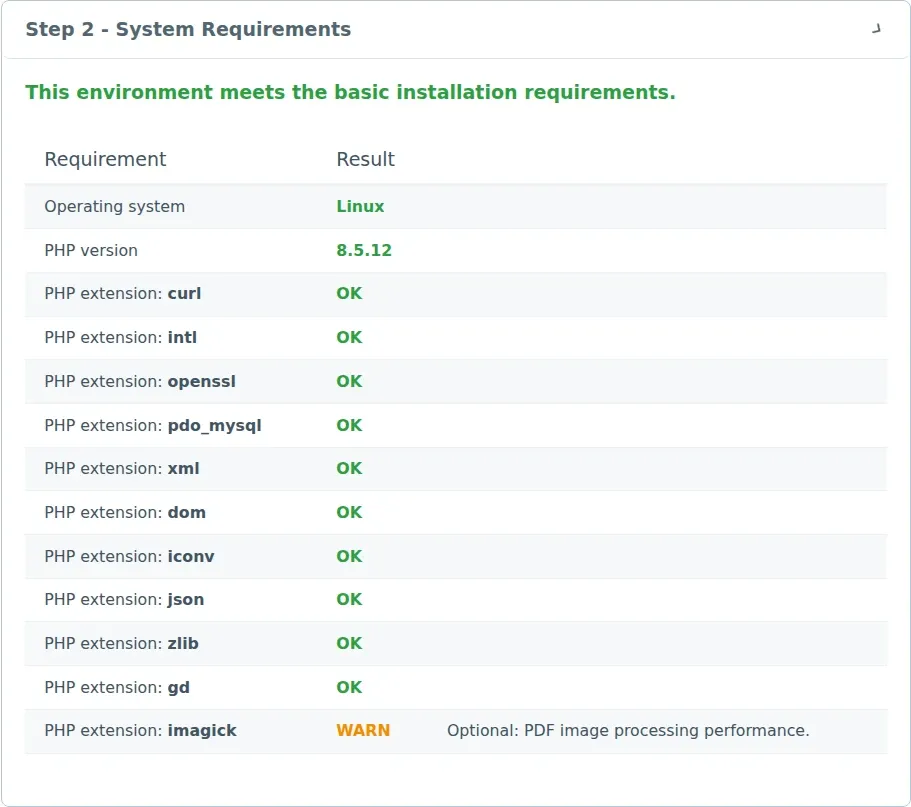
Check the results before continuing to Database Connection. -
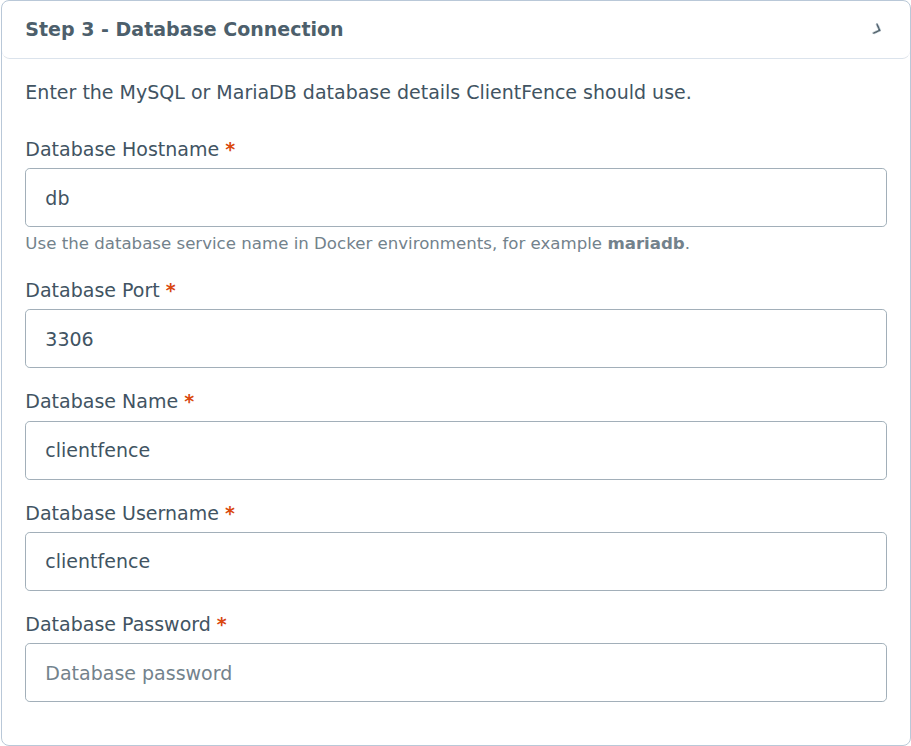
Database Connection. Enter the hostname, port, database name, username, and password for the database you created. Use the connection details from your host, then select Next.
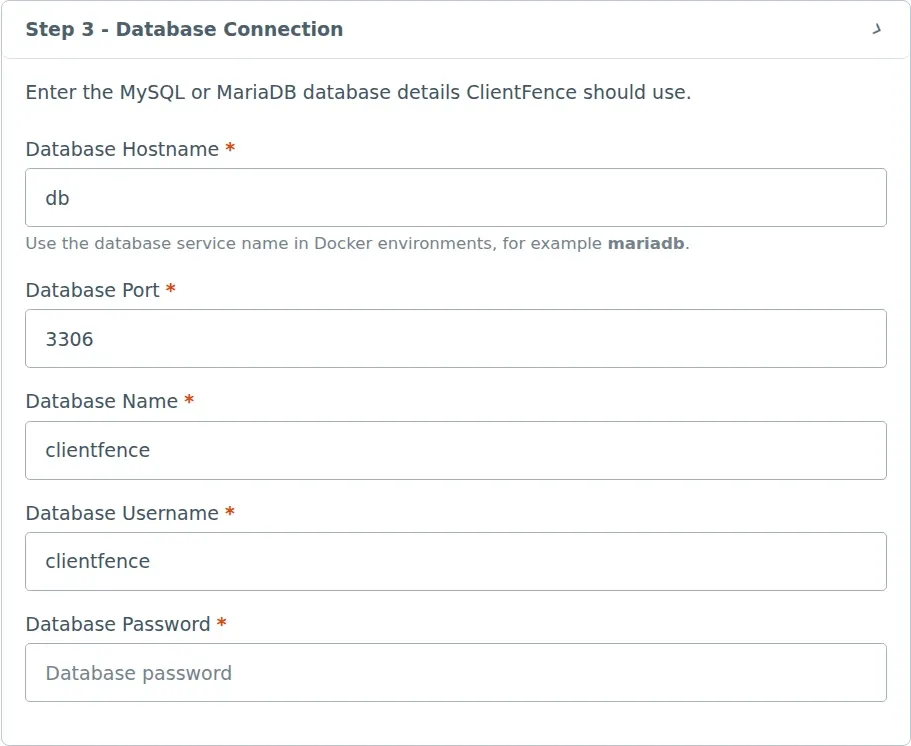
Enter the details for your database. This example uses the hostname db. -
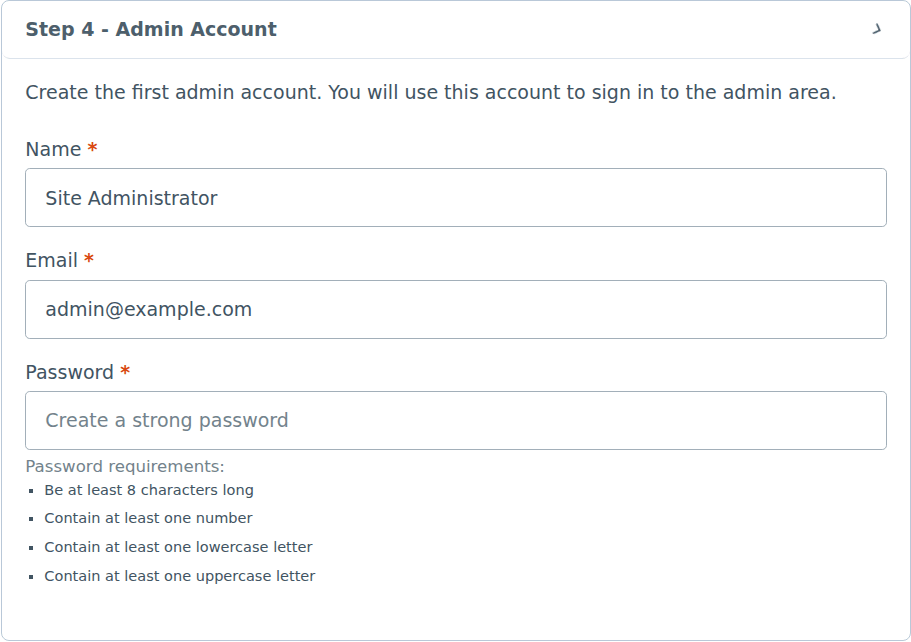
Admin Account. Enter your name, email address, and a strong password for the first admin account, then select Next.
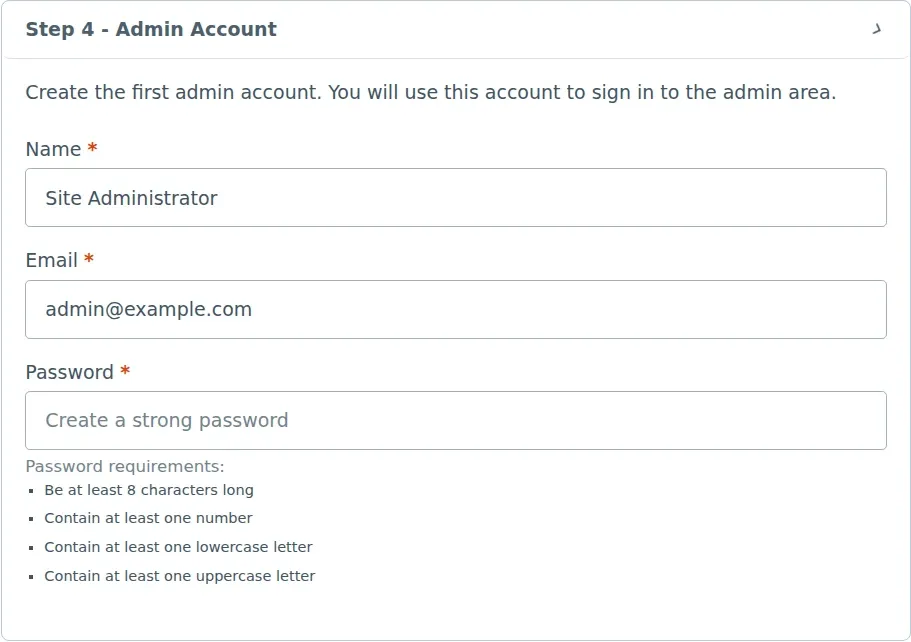
Use this account to sign in to the admin area after installation. -
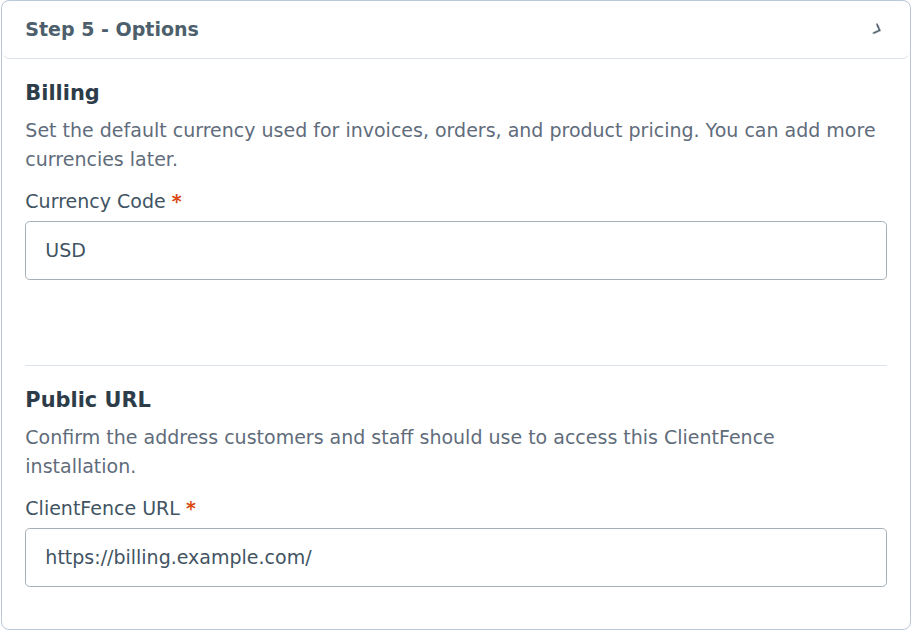
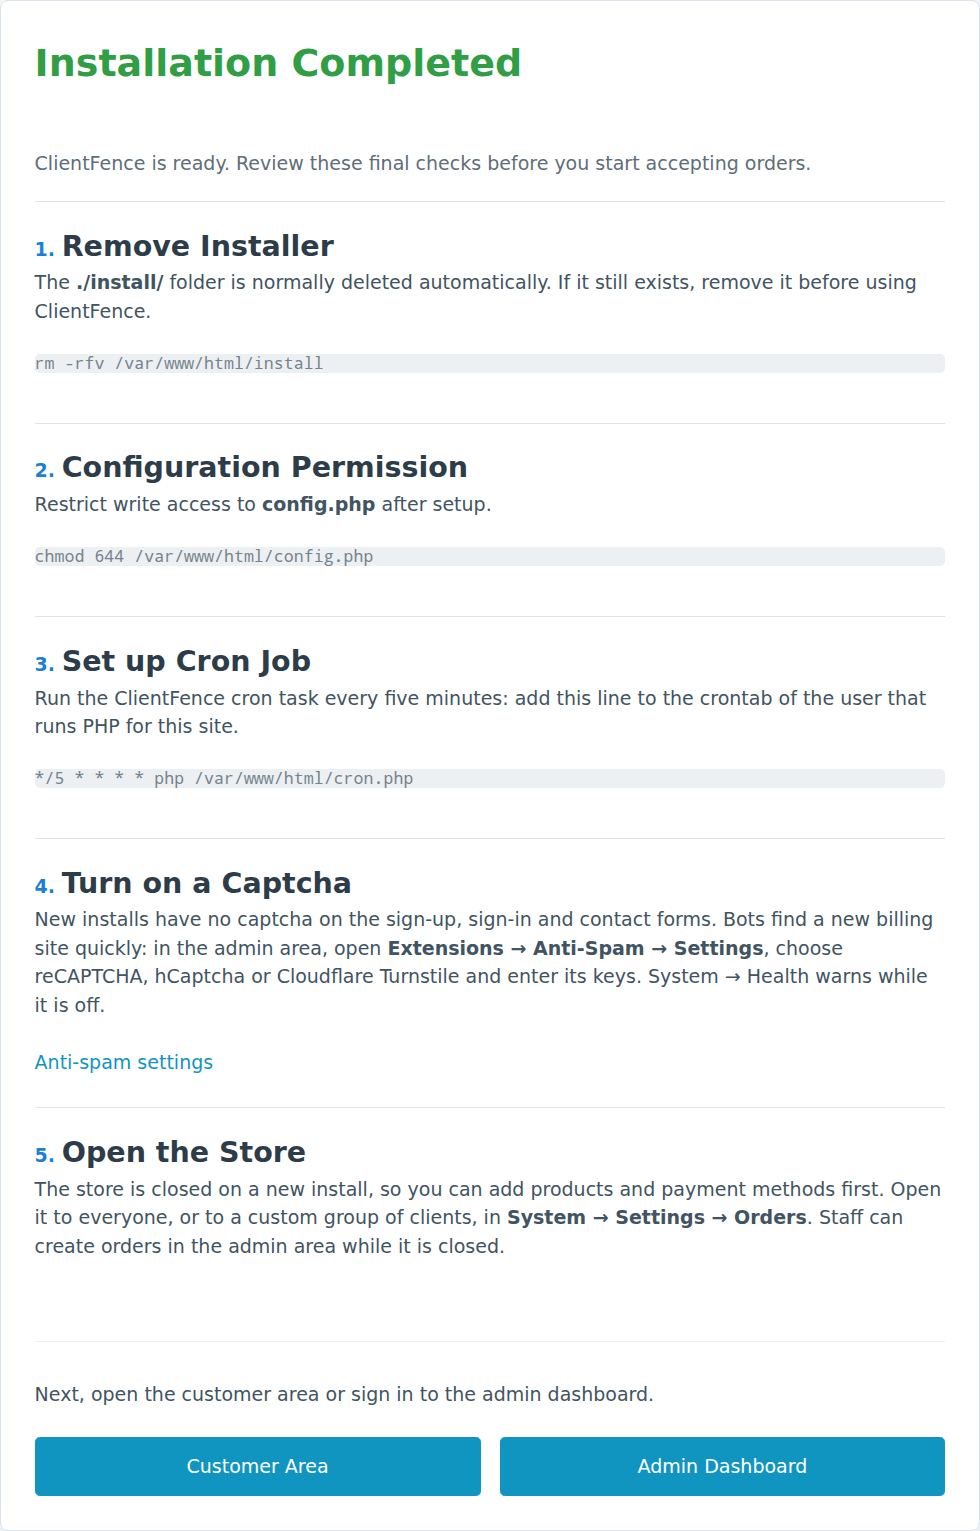
Options. Confirm your default billing currency and the public ClientFence URL. Use your own domain or subdomain in this address. Select Install and wait for Installation Completed.
https://billing.example.com/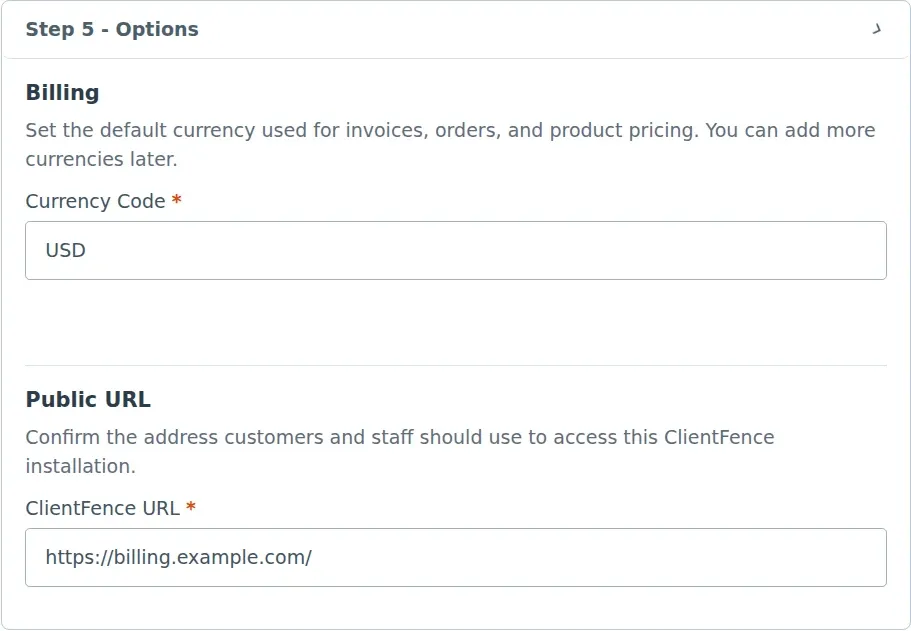
Use the address customers and staff will use to reach your installation.
After the install
Section titled “After the install”-
Use File Manager or your shell to remove the
installfolder if it is still there. Restrict write access toconfig.phpand keep it readable by PHP. -
Select Admin Dashboard on the completion screen or open your site’s admin URL. Quick setup walks you through the basics.
https://billing.example.com/admin -
Set up scheduled tasks using your hosting panel or SSH.
Set up scheduled tasks
Section titled “Set up scheduled tasks”In ClientFence, open System → Settings → Scheduled Tasks and find Recommended Schedule.
Use the cron.php path shown there and the same PHP version your website runs.
Hosting control panel scheduler
Section titled “Hosting control panel scheduler”Set the job to run every five minutes (*/5 * * * *). If your panel has a separate command
field, enter the PHP command with the path from Recommended Schedule.
php /path/to/clientfence/cron.phpSSH crontab
Section titled “SSH crontab”If your host provides user crontabs, run crontab -e as the website user and add the full
line from Recommended Schedule.
*/5 * * * * php /path/to/clientfence/cron.phpAfter five minutes, confirm Last Scheduled Execution shows a recent run. See Scheduled tasks for troubleshooting.
Before opening sales, confirm the client sign-in page loads and check System Health.